TUTORIALS - ModelMD2
Abstract
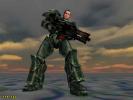
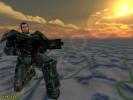
 This tutorial explains how to load and animate an MD2 model in a basic environment. The tutorial about MD3 models is referenced to skip common parts.
Index
- Comments to the ModelMD2 source
- Preparing MD2 models for loading
1. Comments to the ModelMD2 source
First of all you should read carefully the tutorial about MD3 models because a lot of code regarding the set up of the environment is the same. We cover here only the differences related to the model side.
This tutorial refers to the ModelMD2.lua sources included in the file DemoPack0-lua-0.8.0.zip available for download at the Downloads page. Again it's better to keep a copy of the source at hand for easy reference. Also the HTML manual with the list of APOCALYX API may be useful to better understand the meaning of some of the function parameters.
Now let's read the source and comment it. Source skipped parts are marked with --[cut]--.
----MD2 Model
----Questions? Contact: Leonardo Boselli <boselli@uno.it>

----INITIALIZATION----
function init()
--[cut]--
--[[
As we already learned in the tutorial about MD3 models, the engine needs 4 functions to realize the rendering cycle of the scene. Now we cut the code for the camera, skybox, sun, terrain and help lines because already described, thus we jump directly to the code of the model.
]]--
  ----MODELS----
  animation = 0
  weapon = zip:getBasicModel("ogroweapon.md2","ogroweapon.jpg")
  weapon:rescale(0.04)
  weapon:pitch(-1.5708)
  weapon:rotStanding(1.5708)
  weapon:move(0,1,0)
  weapon:setAnimation(animation)
  addObject(weapon)
  local shadow = Shadow(weapon)
  shadow:setMaxRadius(weapon:getMaxRadius()*3)
  addShadow(shadow)
--[[
First of all we load the weapon of the model. MD2 models are made of a single piece (MD3 are broken in 3 pieces instead - legs, torso and head) so they are less flexible but more simple to manage. Anyway the distinction between weapon and character is still valid so weapon change is easy.
Following line by line the code we see that
- animation is a global variable that stores the index of the current animation
- MD2 models are loaded with getBasicModel() (not getModel() like MD3) and the two strings as argument specify respectively the MD2 model file and the image file from which the texture is derived. An optional third argument may specify another grayscale image with the alpha channel of the texture.
- then follow some rotations, translations and rescaling to move the model in place. Again there is the same problem about axis orientations already explained for MD3s.
- finally we choose the current animation, add the model to the world with addObject() and apply a planar shadow.
Note that the camera uses a clipping algorithm to decide if a model is in view or not. That algorithm uses for the models the maxRadius property computed on loading, but it must be set explicitly for shadows. In the code, the maxRadius of the model was increased and passed to the shadow because shadows could still be in view when the model is out of view.
Le's now consider the character.
]]--
  model = zip:getBasicModel("ogro.md2","ogro.jpg")
  model:rescale(0.04)
  model:pitch(-1.5708)
  model:rotStanding(1.5708)
  model:move(0,1,0)
  model:setAnimation(animation)
  addObject(model)
  shadow = Shadow(model)
  shadow:setMaxRadius(model:getMaxRadius()*3)
  addShadow(shadow)
--[cut]--
end
--[[
As you can easily see, we follow the same steps already made for the weapon. In practice, the ensamble character plus weapon is a superposition of two independent models that appear linked when synchronized. No API is currently available to manage the two pieces as one, but it's not difficult to write a helper direclty in LUA.
That ends the init() function and nothing really new appears in update() or final.
]]--
----LOOP----
function update()
--[cut]--
end

----FINALIZATION----
function final()
  ----DELETE GLOBALS----
  animation = nil
--[cut]--
end
--[[
In reality the ModelMD2 demo lacks the control code to move the model around when a walking or run animation is at work. Anyway the code is very similar to the one of ModelMD3, one must only choose carefully the linear and rotational speeds according to the index of the animation. This could be a useful exercise for the reader (Tip: compare the sources of ModelMD2.lua and ModelMD3.lua to figure out which modifications are needed).
Let's now consider the final function: keyDown(). The animation of the model is chosen with the Z key.
]]--
----KEYBOARD----
function keyDown(key)
--[cut]--
  if key == string.byte("Z") then
    releaseKey(string.byte("Z"))
    animation = animation+1
    if animation >= 20 then ---> MAX_ANIMATIONS
      animation = 0
    end
    model:setAnimation(animation)
    weapon:setAnimation(animation)
  end
--[cut]--
end
The idea behind is very simple. Every time the Z key is pressed a new animation is performed in sequence until the maximum number is reached (usually 20).
The animations of MD2 models usually have a fixed meaning, because they are used as standard models in Quake2, but sometimes their authors become creative, so the meaning may vary. It's better to verify case by case which index corresponds to which kind of animation.
I hope that these few explanations are enough for you to understand better how MD2 models are managed in APOCALYX. Feel free to ask for more information if anything is not clear.
2. Preparing MD2 models for loading
This section explains how to prepare an MD2 model for loading in APOCALYX and fortunately the procedure is simpler than the one for MD3 models. MD2 is a very common Quake2 format and there is plenty of (almost) free models already available for download (visit for example http://www.polycount.com).
 Again, to introduce the argument, let's make some step backward. After downloading and unzipping the file DemoPack0-lua-0.8.0.zip, you get several files:
- ModelMD2.lua, that contains the code of this demo. a simple text file the contents of which were explained in the previous section.
- DemoPack0.dat, that includes the resources (images, models etc.) needed by the demos, a ZIP file renamed.
If you open DemoPack0.dat with an unzip utility, you'll find a lot of files in it among which:
- ogro.md2, that contains information about the model structure;
- ogro.jpg, that is the image to be applied as a texture to the model.
 The files above are taken from a standard "*.pak" file (again a ZIP file renamed) from Quake2 or one of its MODs (remember to check the license of the resources before using them in your products, in particular when commercial use is planned - for example, Quake2 resources can not be used without a license from ID Software).
Usually the file of the model is called tris.MD2 and stored deep in the directory structure of the "*.pak" file togheter with its textures in TGA format.
After retrieving the files of interest, you can rename and put them directly in the resource file ready to be read by your LUA scripts.
That's all folks!
Since the procedure is very simple, I hope that these explanations are enough for you, but feel free to ask for more information if anything is not clear.


